BlueStacks – If you want to run Android apps on your Windows 10 PC/laptop, you need an Android emulator app. There are several emulator applications simulate an Android environment that works within the Windows 10 OS.

Table of Contents
BlueStacks App Player
BlueStacks App Player is the most mainstream of all Android emulators that work very well. BlueStacks is compatible with various Windows version, generally run fine under Microsoft Windows 10, 8, 8.1, 7, Vista and XP on either a 32-bit or 64-bit setup. The newest update of Bluestacks also improved speed, even on older computers.
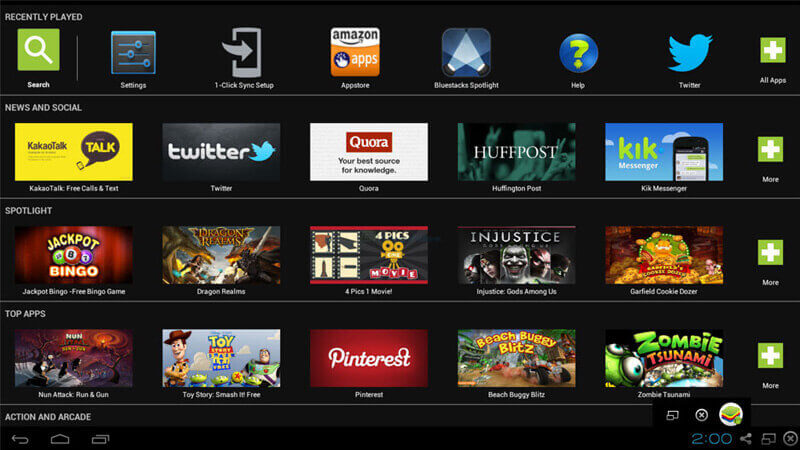
Once up and running BlueStacks looks like any Android tablet. It has the usual Android front end, menus and more. You can control it with a mouse or touch if you have a touchscreen. The rest looks and feels just like Android. It does like notifying you of every possible thing which you might find annoying. Other than that, it is an excellent emulator that mimics an Android device very credible indeed.
Android APK Files
Android APK files are the packages that contain the apps. The file name is usually something like “filename.apk” and is much like a “.exe” file in Windows OS. While similar, they are very different languages, hence the need for the Android SDK.

How to Install and Run Android Apps on Windows 10 PC/Laptop using BlueStacks App Player
Download and Install the BlueStacks App Player
Here are the step-by-step how to download and install BlueStacks Android Emulator in Windows 10 PC/laptop:
- In Windows 10, open your browser application (e.g., IE, Microsoft Edge, Google Chrome, Firefox, etc.).
- Go to the official BlueStacks website https://www.bluestacks.com and download the installer file.
- Run the installer file to install BlueStacks App Player on Windows 10 PC/laptop. You will be taken through the installation process. Follow the on-screen instruction and accept the defaults setting.
- You will be prompted to create a BlueStacks account using your current Google account. Click “Sign in with Google” and then follow the instructions to create a new BlueStacks account. Once you finish setup BlueStacks account, you will be presented with your BlueStacks Profile name. Remember that and then click “Done.”
- Set up Android in BlueStacks. Now, you will be asked to set up your “Android device” in the BlueStacks app. It is just like setting up a new physical Android device. Follow the on-screen instructions.
- Sign in to your Google Account. While setting up your “Android device” in the BlueStacks app, you will be asked to sign in with your existing Google account so you can access the Google Play Store and other exciting features.
That’s all. You have BlueStacks installed on your Windows PC/laptop. Now you can install Android APK files.
Sometimes you have a problem when installing BlueStacks in Windows 10. You can follow the tutorial on how to get help in Windows 10, so you can solve the problem.

Download and Install APK files from Google Play Store
Here are step-by-step install APK files using BlueStacks Android Emulator in Windows 10 PC/laptop from Google Play Store:
- Open the Bluestacks application.
- From the Android Home Screen similar to the one on your phone or tablet. Search for the app you want to install and run it just like you are on your Android device. The search results will be shown on your screen. You can search the app right from the Home Screen or using the Play Store app.
- Click on the APK file and then select “Install” option to download and install the app on your Windows PC/laptop.
- The APK file will be downloaded and installed on your computer quickly, and then you can use the app.
Download and Install APK file from Windows folder
Here are step-by-step install APK files using BlueStacks Android Emulator in Windows 10 PC/laptop from Google Play Store:
- Open the Bluestacks application.
- Locate the folder in which the APK file is downloaded and stored.
- Right-click on the APK file and select “Open in BlueStacks” option. Alternatively, you could even download APK files from within the BlueStacks App Player.
- The APK file will open up within the BlueStacks.
- Now click on the “Install” button to install the app in the BlueStack app player.
That’s it. You have successfully downloaded and installed APK files on Windows 10 PC/laptop.


